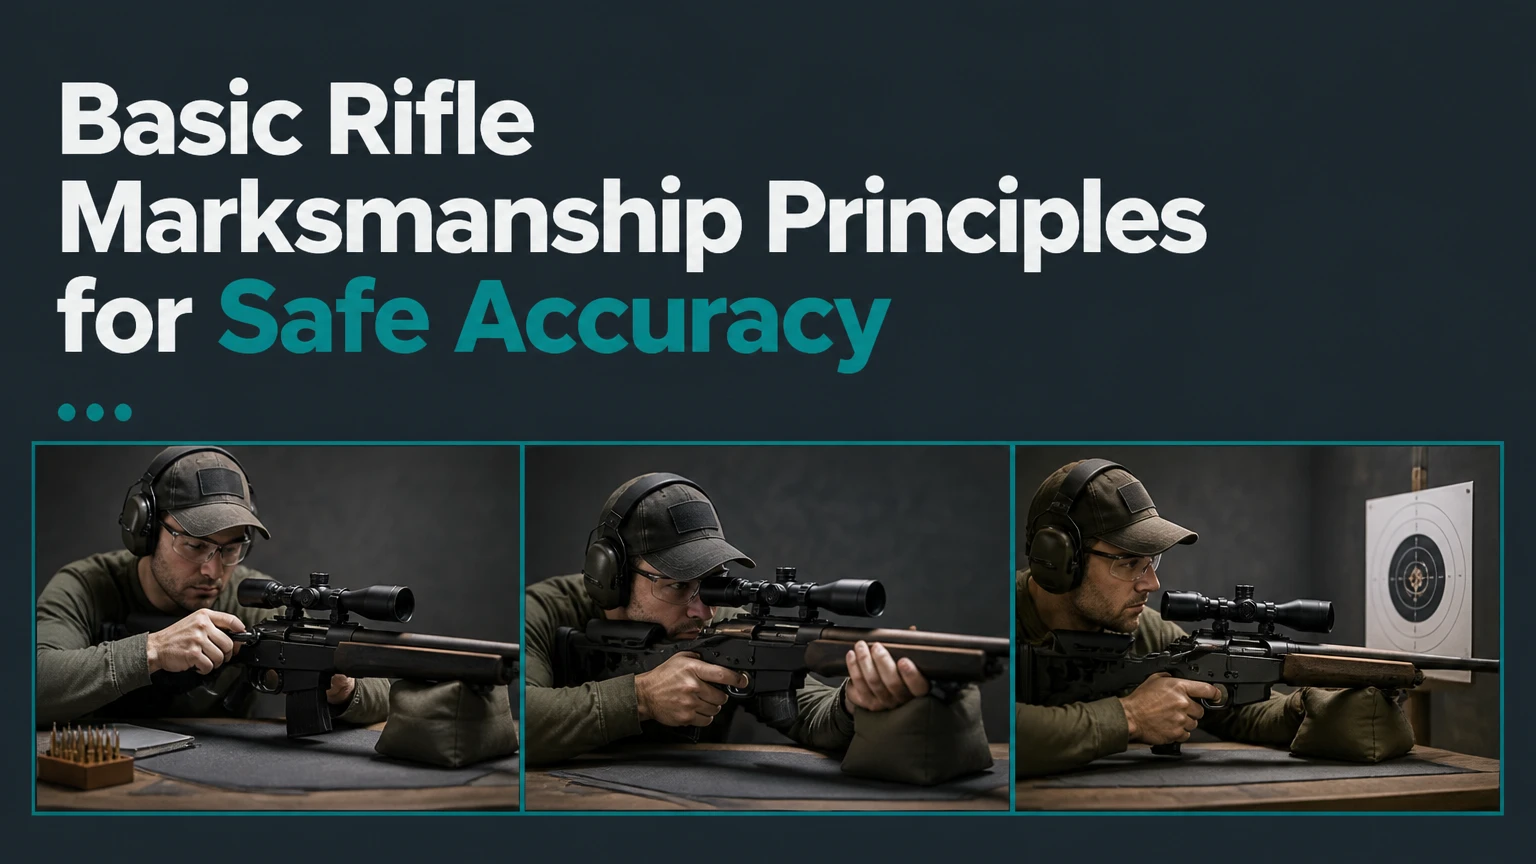
Basic rifle marksmanship principles are the repeatable skills that help a shooter maintain a safe rifle, stable position, consistent sight picture, controlled breathing, and predictable trigger movement. The framework improves shot consistency by reducing avoidable human variation, but it does not replace firearm-safety training, range rules, competent supervision, or compliance with local law.
Key Facts at a Glance
Basic Rifle Marksmanship, or BRM, organizes shooting around position, aiming, breathing, trigger control, and follow-through.
A stable position uses skeletal support and repeatable contact points rather than unnecessary muscular tension.
Sight alignment describes the relationship among the sights; sight picture describes the aligned sights in relation to the target.
A respiratory pause should remain brief and comfortable, because forced breath-holding can increase movement and visual strain.
Minute of Angle, or MOA, measures angular dispersion; 1 MOA is approximately 1.047 inches at 100 yards.
A small group does not prove a correct zero, and a correct zero does not guarantee a small group under every condition.
What Are Basic Rifle Marksmanship Principles?
Basic Rifle Marksmanship is a structured method for making rifle operation and aiming more consistent. The traditional fundamentals are a steady position, aiming, breath control, and trigger control, with follow-through connecting the trigger break to recovery and observation.
The framework applies to recreational target shooting, hunting practice, formal marksmanship courses, and supervised service training. BRM is not a complete tactical doctrine, self-defense plan, or substitute for judgment about whether a shot is lawful and safe. It addresses the shooter-rifle interface.
A useful mental model is a chain of dependencies. Position determines how much movement reaches the sights; sight alignment determines where the rifle is pointed; breathing affects motion during the aiming period; trigger movement can disturb the rifle immediately before discharge. Follow-through helps the shooter identify whether the rifle remained stable through the shot.
The U.S. Army’s TC 3-22.9, Rifle and Carbine, and U.S. Marine Corps rifle-marksmanship materials both treat fundamentals as an integrated process rather than isolated tricks. The NRA’s widely published safety rule states, “Always keep the gun pointed in a safe direction.” Safety comes before every accuracy objective.
What Are the Four Core Fundamentals?
The four core fundamentals are position, aiming, breathing, and trigger control. Follow-through is best treated as the final part of trigger control and shot analysis rather than a separate substitute for the four fundamentals.
Position: Build a Repeatable Platform
A stable rifle position places the rifle in the same relationship to the shooter for every shot. The shoulder, support hand, cheek, and body should create repeatable contact points while the rifle rests on bone structure or approved support whenever the position allows.
The buttstock should contact the shoulder pocket consistently. The cheek should return to the same stock location, because even a small change in eye position can alter sight alignment or create scope shadow. The firing hand should control the rifle without squeezing so hard that tension reaches the trigger finger.
The support hand should hold or support the fore-end according to the rifle and position. A sling, rest, bipod, or front bag can improve stability, but support should not force the barrel against a hard surface unless the rifle manufacturer and instructor specifically approve that technique.
Aiming: Separate Alignment From Picture
Sight alignment is the relationship among the front sight, rear sight, and the shooter’s eye. Sight picture is the aligned sight system placed over the intended point of aim. With iron sights, the front sight normally receives the sharpest focus; with a red-dot sight, the aiming point appears on the target plane; with a magnified optic, eye relief and parallax also matter.
Iron sights require consistent front-and-rear alignment. Red dots allow both-eyes-open aiming and generally reduce alignment complexity, although the dot must still be placed consistently and the optic must be correctly mounted and zeroed. A magnified scope adds magnification, elevation and windage adjustments, eye-relief constraints, and possible parallax error.
Aiming errors can resemble trigger errors. If the sight picture changes before the shot, the shooter should first inspect position, eye placement, and natural point of aim before changing the trigger technique.
Breathing: Use a Comfortable Pause
Breathing moves the chest, shoulders, and sometimes the rifle, so a shooter should avoid breaking the shot during obvious respiratory movement. A comfortable pause near the end of a normal exhalation often provides a short period of reduced movement.
The pause is not a universal two- or three-second requirement. Body position, exertion, temperature, anxiety, medical conditions, and clothing all change breathing rhythm. A shooter who feels strain, blurred vision, dizziness, or urgency should breathe normally, lower the rifle safely, and restart the aiming process.
A common error is holding the breath too long in pursuit of a perfectly motionless sight picture. Oxygen deprivation increases discomfort and can create more movement than ordinary breathing. The practical rule is simple: pause briefly, press the trigger if the sight picture remains acceptable, and stop the attempt when the hold becomes forced.
Trigger Control: Move the Trigger Independently
Trigger control means moving the trigger without disturbing the rifle’s alignment. The trigger finger should contact the trigger consistently, and pressure should move the trigger through its travel without the firing hand twisting the grip or pulling the rifle sideways.
Many shooters use the first pad of the index finger, but the correct contact point depends on trigger geometry and hand size. The real test is whether the trigger movement moves the sights. Contact that is too shallow or too deep can push the rifle laterally.
A controlled trigger press may include taking up slack, meeting the resistance point, and continuing pressure until the mechanism releases. The shooter should not jerk toward a perceived perfect instant. After the shot, maintaining the same position briefly allows observation of the sight picture and helps reveal movement that occurred during discharge.
How Should a Shooter Establish Natural Point of Aim?
Natural point of aim is the direction the rifle points when the shooter relaxes unnecessary muscle tension while maintaining a safe position. If the rifle repeatedly points away from the intended target, the shooter should adjust the body or support rather than forcing the rifle sideways with the arms.
For supported practice, use this sequence:
- Establish the shoulder, cheek, and support contacts.
- Aim at the target without forcing the rifle into place.
- Close the eyes briefly or look away.
- Reopen the eyes and observe where the sights naturally point.
- Shift the body or support until the rifle returns near the intended point.
- Recheck the position after each meaningful adjustment.
You will know the position is improving when the sights return to the same area without muscular correction. A common mistake is rotating the rifle with the firing arm, which creates fatigue and makes the point of aim change between shots.
The strongest position is not always the most useful position. Prone usually offers the greatest stability, while standing provides the most mobility and the widest view over low vegetation. Shooters should build accuracy in supported positions before adding unsupported complexity.
Which Rifle Position Is Most Stable?
Supported prone is usually the most stable rifle position, followed by supported kneeling or sitting, then unsupported kneeling and standing. The correct choice depends on terrain, visibility, mobility, physical limitations, and the need to maintain a safe field of fire.
| Position | Typical stability | Main support | Primary limitation |
|---|---|---|---|
| Supported prone | Highest | Ground, bipod, front bag, body | Reduced mobility and obstructed view |
| Unsupported prone | High | Ground and skeletal alignment | Less adaptable to uneven terrain |
| Supported kneeling | Medium-high | Knee, sling, rest, or support | Hip and ankle mobility constraints |
| Unsupported kneeling | Medium | Lower leg and body structure | Greater balance demands |
| Standing offhand | Lowest | Feet, hips, torso, arms | Wobble and fatigue increase quickly |
When Should Each Position Be Used?
Prone suits deliberate target practice when the ground is safe, visibility is sufficient, and mobility is not the priority. Kneeling can raise the sight line above short obstacles while retaining more stability than standing. Standing is valuable for developing balance and sight management, but it normally produces the largest movement zone.
Physical differences matter. A shorter shooter may need stock or cheek-rest adjustment; a shooter with knee limitations may need seated or supported alternatives. A position that causes pain is not a reliable training position.
Which Sighting System Fits the Task?
Iron sights are durable and battery-independent, red dots are generally fast to acquire at modest distances, and magnified optics provide more detail for smaller or more distant targets. No sighting system guarantees accuracy because mounting, zero, eye position, ammunition, and shooter technique remain separate variables.
| Sighting system | Magnification | Strength | Limitation | Typical use |
|---|---|---|---|---|
| Aperture iron sights | 1x | No battery; rugged | Requires precise alignment | Basic skill development |
| Red-dot sight | 1x | Both-eyes-open aiming | Battery and brightness dependence | Short to moderate range |
| Fixed-power scope | 2.5x-4x | Simple magnified aiming | Narrower field at close range | Hunting and target practice |
| LPVO | 1x-6x or 1x-8x | Variable field and detail | Heavier; more setup variables | Mixed-distance target work |
| Precision scope | 5x-25x typical | Fine aiming and observation | Weight, cost, and slower acquisition | Deliberate long-range work |
The AI Overview’s 0-200-yard red-dot range is not a universal boundary. Target size, lighting, shooter vision, reticle design, rifle accuracy, and local range conditions determine practical performance. Red dots can work beyond 200 yards on large targets, while a magnified optic can be unnecessarily slow or cumbersome for simple close-range practice.
How Do MOA and Group Size Measure Accuracy?
MOA measures angular dispersion, so 1 MOA equals approximately 1.047 inches at 100 yards, 2.094 inches at 200 yards, and 3.142 inches at 300 yards. Shooters commonly round those values to 1, 2, and 3 inches for field calculations.
| Distance | 1 MOA exact approximation | 2 MOA approximation | 4 MOA approximation |
|---|---|---|---|
| 50 yards | 0.52 inches | 1.05 inches | 2.09 inches |
| 100 yards | 1.05 inches | 2.09 inches | 4.19 inches |
| 200 yards | 2.09 inches | 4.19 inches | 8.38 inches |
| 300 yards | 3.14 inches | 6.28 inches | 12.57 inches |
A group measures consistency around a center; zero measures the relationship between that center and the intended point of aim. A rifle can produce a tight group that is several inches away from the aiming point. Conversely, a group can be centered correctly while remaining too large for the intended task.
A universal “2 MOA BRM competency” standard should be treated cautiously. Military qualification standards, hunting expectations, rifle specifications, ammunition, target size, distance, and environmental conditions differ. Record five-shot or ten-shot groups at a known distance, note the ammunition and conditions, and compare repeated groups rather than one unusually good result.
What Is the Safest Way to Build BRM Skill?
The safest progression begins with a certified instructor, unloaded handling, dry practice under controlled conditions, supported live fire, and gradual movement to less-supported positions. The shooter should master safe loading, unloading, muzzle control, and range commands before concentrating on group size.
Before You Start
| Requirement | Typical value |
|---|---|
| Instruction | 1-2 hours for a first supervised session |
| Live-fire session | 50-100 rounds |
| Practice frequency | 1-2 sessions weekly |
| Eye protection | 1 pair, impact-rated |
| Hearing protection | 1 set of plugs or muffs |
| Target distance | 25-100 yards, range dependent |
| Beginner platform | .22 LR rifle under supervision |
Use the rifle’s manual, approved ammunition, a safe range, a known backstop, and properly fitted eye and hearing protection. Keep the action open when directed, keep the muzzle in a safe direction, and place the trigger finger outside the trigger guard until the instructor or range procedure authorizes firing.
A safe practice block can use five-round groups, deliberate pauses, and written observations. Stop when concentration, vision, hearing protection, or physical control deteriorates. More ammunition cannot compensate for declining supervision or worsening technique.
What Are the Most Common Grouping Errors?
Vertical groups often involve inconsistent breathing, changing shoulder pressure, or varying support, while horizontal groups can involve trigger movement, grip tension, crosswind, or inconsistent cheek placement. A target pattern is a clue, not a diagnosis, because ammunition and rifle defects can produce similar results.
| Group pattern | Possible shooter cause | Other possible cause | First check |
|---|---|---|---|
| Vertical string | Breathing or shoulder pressure | Changing velocity or unstable rest | Position and ammunition |
| Horizontal spread | Trigger movement or grip tension | Crosswind or loose optic | Trigger press and mounts |
| Diagonal spread | Combined position and trigger error | Cant or uneven support | Rifle cant and cheek weld |
| Tight group, wrong location | Sight picture or zero | Optic shift or ammunition change | Zero and mounting screws |
| Random wide group | Fatigue or inconsistent contact | Damaged crown or poor ammunition | Rifle condition and rest |
How Can Flinching Be Reduced?
Flinching is an anticipatory movement that occurs before or during discharge. Reduce it by using appropriate ammunition, lowering recoil exposure, practicing unloaded sight and trigger movements, and working with a qualified instructor who can observe the shooter safely.
A supervised ball-and-dummy exercise can reveal anticipation, but it must follow the range’s rules and be conducted by a competent person who controls loading and muzzle safety. Do not use a partner-based drill casually or without a clear procedure. A .22 LR training rifle can reduce noise and recoil while preserving position, aiming, breathing, and trigger practice.
Why Does a Rifle Shoot Away From the Zero?
A rifle may shoot away from its zero because the optic moved, the ammunition changed, the rifle was supported differently, the distance was misjudged, or the shooter used a different sight picture. Confirm the rifle mechanically before changing multiple variables.
Check the mount, optic, action screws, ammunition lot, target distance, and group center. Fire only under the range’s approved procedure, and make one change at a time. A single impact should not trigger a large adjustment.
How Do Conditions Change Marksmanship?
Light, wind, temperature, clothing, fatigue, and body position change the relationship between shooter, rifle, and target. BRM principles remain stable, but the amount of visible movement and the size of the acceptable aiming area change with conditions.
Bright sunlight can wash out an optic or create glare. Low light can reduce iron-sight definition and make an illuminated reticle appear too bright. Wind affects the projectile after it leaves the barrel, while a gust can also move the shooter or target material.
Cold weather changes dexterity and battery performance. Heavy clothing changes cheek weld and shoulder contact. Fatigue increases trigger disturbance and makes standing positions less repeatable. Record conditions in a log so a changed group is not automatically blamed on technique.
Which Training Path Fits a New Shooter?
A recreational beginner should prioritize safe handling and consistent fundamentals with a low-recoil rifle; a hunter should add field positions and weather awareness; a precision student should add measurement, optics, and ballistic instruction only after basic consistency is established.
| Shooter situation | Suitable starting platform | Typical initial cost | First training objective |
|---|---|---|---|
| Recreational beginner | .22 LR rifle and simple optic | $400-$900 | Safe handling and 25-50-yard groups |
| Hunter preparing for a season | Centerfire rifle with legal hunting ammunition | $600-$1,500 | Supported and field-position consistency |
| Target competitor | Match-capable rifle and quality optic | $1,500-$4,000 | Recorded groups and position repeatability |
| Precision student | Bolt-action rifle with adjustable optic | $2,000-$5,000+ | Measurement, wind education, and coaching |
These are typical equipment ranges, not universal prices. Local taxes, used equipment, instructor fees, ammunition availability, and range membership can change the total substantially.
A duty or tactical course requires additional legal, institutional, and safety controls. Dynamic movement, multiple-target exercises, and defensive scenarios should be learned only through qualified, authorized instruction. They are outside the scope of basic rifle marksmanship fundamentals.
What Is BRM Not Good For?
Basic Rifle Marksmanship is not a substitute for tactical decision-making, hunting ethics, weapon maintenance, medical preparation, or legal guidance. A shooter can understand trigger control and still lack the judgment required to identify a target, evaluate a backstop, or decide not to fire.
BRM also cannot overcome unsuitable equipment. A damaged optic, loose mount, poor ammunition, incorrect eye relief, or rifle fit problem can limit results even when the shooter performs the fundamentals correctly. Equipment diagnosis should occur before increasingly complicated drills.
The framework is also not a promise of a specific group size. Human vision, recoil tolerance, rifle design, environmental conditions, and target distance create legitimate variation. Good instruction identifies the limiting variable instead of assigning every error to the shooter.
How Should a Shooter Evaluate Improvement?
Improvement means producing more consistent groups with fewer safety or process errors under comparable conditions. Track distance, ammunition, position, sighting system, group size, weather, and observed technique after each session.
Use a simple record:
- Fire the same number of shots per group.
- Measure the group using the same method.
- Record the group center relative to the point of aim.
- Note position, ammunition, light, wind, and fatigue.
- Change one variable during the next session.
- Stop if safety, control, or concentration declines.
The most useful measure is repeatability across several sessions. A single small group may result from chance, favorable conditions, or an unusually good shot. A stable process produces similar results when distance, ammunition, and position remain controlled.
Frequently Asked Questions
Is BRM the Same as Rifle Qualification?
BRM is the skill foundation used before or within many qualification programs, but qualification adds a specific course of fire, target standards, time limits, positions, and scoring rules. A shooter can understand BRM fundamentals without meeting a particular military, law-enforcement, hunting, or competition qualification.
Should Beginners Start With Iron Sights?
Beginners can start with iron sights, a red dot, or a simple magnified optic, depending on vision, instruction, and the intended activity. Iron sights teach alignment directly, while a red dot may reduce visual complexity. A qualified instructor should prioritize safe handling and repeatable technique over equipment loyalty.
How Many Rounds Are Needed to Learn the Fundamentals?
A supervised beginner session of 50-100 carefully observed rounds can introduce the fundamentals, but proficiency develops over multiple sessions. Ten rushed rounds provide less useful practice than five deliberate rounds with consistent position, recorded results, and immediate correction.
Does a Heavier Trigger Always Reduce Accuracy?
A heavier trigger can increase disturbance for some shooters, but trigger weight alone does not determine accuracy or safety. Trigger travel, break quality, grip fit, rifle movement, and training matter as well. Never modify a trigger without qualified inspection and compliance with the manufacturer’s specifications and applicable law.
Why Is a Rifle Accurate From a Rest but Not From Standing?
A rest removes much of the body movement that affects unsupported shooting. Standing adds balance, muscle fatigue, breathing movement, and a larger natural wobble zone. The difference does not necessarily indicate a rifle problem; it usually shows that unsupported position practice needs separate development.
Can BRM Principles Improve Hunting Accuracy?
BRM principles can improve hunting accuracy by making rifle fit, sight alignment, breathing, trigger movement, and position more repeatable. Hunting also requires target identification, backstop assessment, ethical shot selection, local regulation compliance, and practice with the exact rifle and ammunition used in the field.
The Bottom Line
Basic rifle marksmanship principles reduce avoidable variation through a stable position, consistent sight alignment and sight picture, comfortable breathing control, independent trigger movement, and deliberate follow-through. Start with safety and supervised practice, measure groups under consistent conditions, diagnose patterns cautiously, and choose equipment that fits the shooter and task. The strongest BRM result is not a claimed number such as 2 MOA; it is safe, repeatable performance that remains understandable when conditions change.


