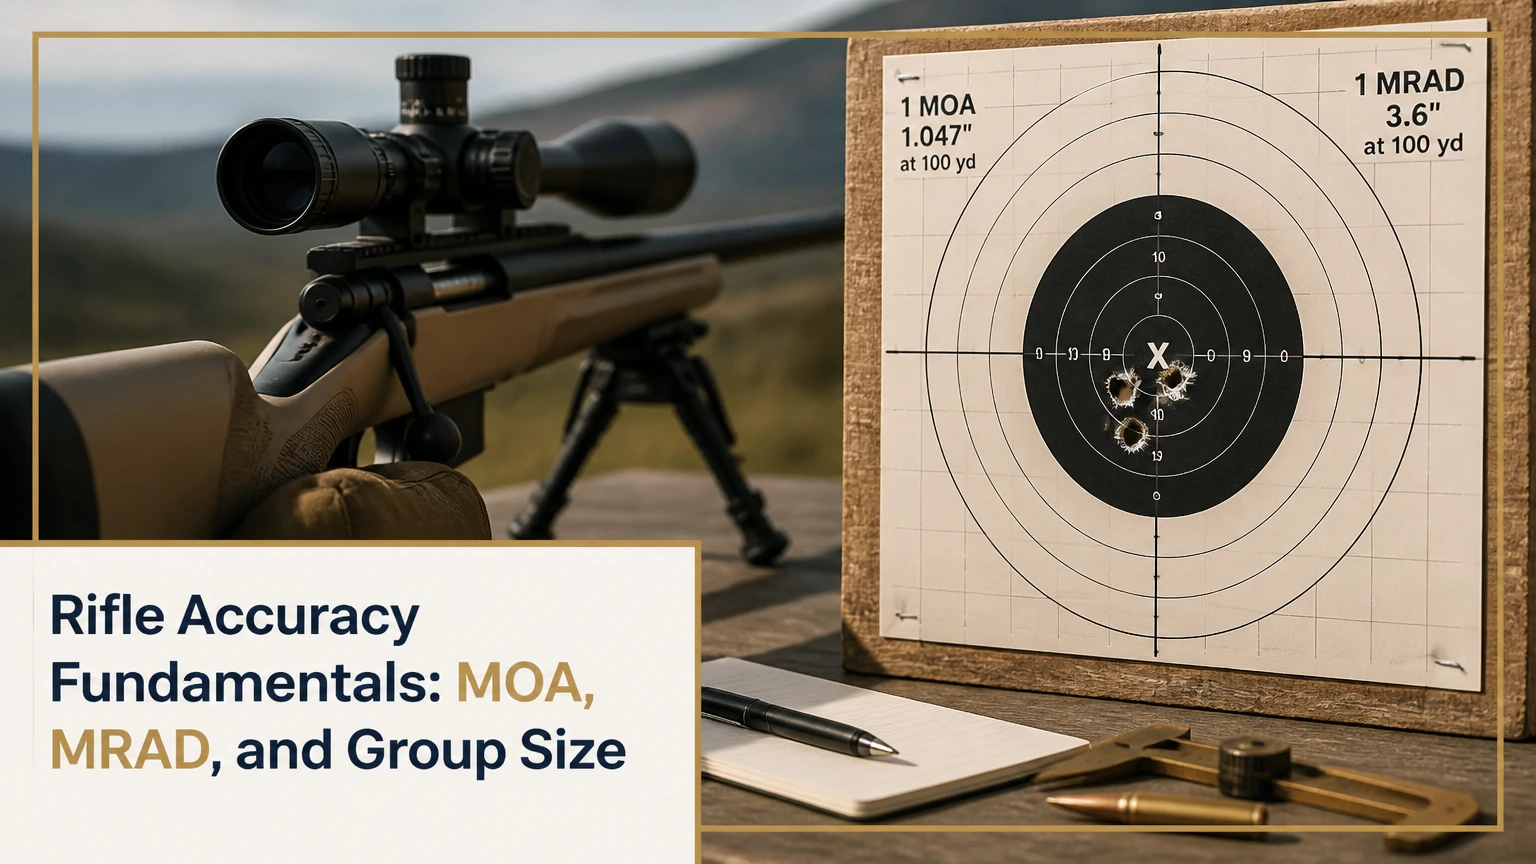
Rifle accuracy fundamentals describe how ammunition, rifle mechanics, optics, environmental conditions, and shooter technique combine to place shots consistently. Mechanical precision creates a tight group, while practical accuracy places that group at the intended point of aim. Reliable results come from controlling variables and measuring them separately.
Key Facts at a Glance
Mechanical precision is the rifle-and-ammunition system’s ability to produce a small group.
Practical accuracy includes the shooter, position, optic, environment, and aiming process.
One MOA measures 1.047 inches at 100 yards, while one MRAD measures 3.6 inches at 100 yards.
A cold barrel is not automatically inaccurate, but temperature, fouling, and stock contact can shift point of impact.
Bullet stability depends on bullet length, mass, velocity, and rifling twist, not weight alone.
A valid accuracy claim requires repeated groups, consistent conditions, and a documented measurement method.
What Are Rifle Accuracy Fundamentals?
Rifle accuracy fundamentals are the measurable principles that control shot dispersion and point-of-impact consistency. The main variables are mechanical precision, ammunition uniformity, bullet stability, optic alignment, rifle support, trigger control, environmental conditions, and the shooter’s ability to repeat the same process.
Accuracy and precision are related but different. A rifle can produce a 0.8-MOA group that is centered several inches away from the aiming point, which indicates strong precision and an incorrect zero. A rifle can also place one shot near the center by chance while producing a wide group, which does not demonstrate accuracy.
The useful diagnostic model has four layers:
- Precision: How tightly the shots cluster.
- Zero: Where the center of that cluster lies relative to the point of aim.
- Repeatability: Whether the rifle returns to the same result after cooling, cleaning, transport, or ammunition changes.
- Practical accuracy: How well the complete system performs from the position and distance that matter.
The U.S. Army’s TC 3-22.9, Rifle and Carbine identifies steady position, aiming, breath control, and trigger control as core marksmanship fundamentals. That framework remains useful, but a modern accuracy evaluation must also account for ammunition, optics, wind, barrel temperature, and measurement error.
How are accuracy and precision different?
Precision describes group tightness; accuracy describes closeness to the intended point of impact. A five-shot group is more informative than a single hit because dispersion shows the rifle’s repeatable behavior rather than one favorable outcome.
For a practical test, record the ammunition lot, distance, temperature, wind, barrel condition, group size, and group center. A rifle that groups tightly but shifts between ammunition lots has usable precision with limited ammunition flexibility. A rifle that prints wide groups consistently has a mechanical, ammunition, support, or technique problem that zero adjustment cannot solve.
How Does a Rifle Produce a Group?
A rifle produces a group through a linked sequence of ignition, pressure generation, bullet engraving, barrel vibration, recoil, muzzle exit, and aerodynamic flight. Accuracy depends on reducing variation at each stage, not on making the bullet leave the barrel at one magical vibration point.
When the firing pin initiates the primer, burning propellant creates expanding gas that accelerates the bullet. The bullet engages the rifling, which imparts spin and stabilizes the projectile through gyroscopic action. Small differences in ignition, powder burn, bullet alignment, barrel temperature, and muzzle velocity alter the bullet’s exit conditions.
Barrel harmonics matter because a barrel bends and vibrates during firing. However, describing the goal as making every bullet exit at a fixed “node” is too simple. A barrel’s vibration pattern changes with ammunition, pressure, temperature, action bedding, suppressor use, and the way the rifle is supported. Consistency is the practical goal.
Aerodynamics then take over. Ballistic coefficient, velocity, air density, wind, and bullet stability affect trajectory. At short range, a small velocity difference may be invisible; at extended range, the same variation can create vertical dispersion.
What creates vertical dispersion?
Vertical dispersion commonly comes from muzzle-velocity variation, inconsistent elevation support, changing shoulder pressure, breathing movement, uphill or downhill aiming, and temperature-related point-of-impact shift. Wind can also create apparent vertical spread when it changes direction or when the shooter misreads a crosswind as a range error.
Velocity standard deviation is useful but incomplete. A low SD does not guarantee small groups if bullets vary in alignment, the rifle is poorly supported, or the optic moves. Match ammunition may show an SD below 10 feet per second in a particular rifle, but that figure is a typical performance target, not a universal accuracy requirement.
What Are the Four Practical Fundamentals?
The four practical fundamentals are a stable position, natural point of aim, consistent sight alignment, and controlled shot execution. Each fundamental prevents the shooter from adding a different error to every shot.
1. Build a stable, repeatable position
Use bone support and equipment support instead of holding the rifle with muscular tension. In prone, align the torso generally behind the rifle so recoil travels into the body rather than forcing the muzzle sideways.
A bipod supports the front, while a rear bag or support hand controls elevation. Avoid loading a bipod aggressively unless the rifle and surface produce the same result every time. Hard surfaces can cause bounce, and soft ground can allow the rifle to settle differently between shots.
A consistent cheek weld matters because head position changes eye alignment and perceived reticle position. Stock pressure also matters. A rifle that touches a barricade, sling, bag, or cheek inconsistently may print a different group even when the trigger press appears correct.
Success checkpoint: The reticle returns near the same point after recoil without muscular correction.
Common mistake: Pulling the rifle into the shoulder with changing force. Use a repeatable contact point and record the support method.
2. Establish natural point of aim
Natural point of aim is the direction the rifle points when the shooter is relaxed and the position supports the rifle. If the reticle moves away from the target when the eyes close, shift the body or support rather than forcing the rifle back with the arms.
A practical NPA check is simple:
- Set the rifle on target.
- Relax the shoulders, hands, and facial muscles.
- Close the eyes for several seconds.
- Open the eyes and observe the reticle.
- Reposition the body until the reticle returns naturally.
NPA is not a substitute for aiming. It is a way to remove unnecessary muscular correction before aiming begins.
Success checkpoint: The reticle returns to the target after relaxation with minimal movement.
Common mistake: Treating NPA as a fixed stance. Prone, kneeling, sitting, bench, and barricade positions each require separate checks.
3. Control sight alignment and parallax
Sight alignment requires a repeatable relationship between the eye, optic or sights, and target. Scope parallax occurs when the reticle appears to move against the target as the shooter’s eye position changes, even though the rifle remains stationary.
A clear, circular field of view does not prove that parallax is eliminated. Set the scope’s parallax adjustment to the target distance, then move the eye slightly while watching whether the reticle shifts relative to the aiming point. If the reticle moves, refine the adjustment and maintain a consistent cheek weld.
First focal plane reticles preserve subtension values throughout their magnification range. Second focal plane reticles preserve apparent reticle size, but their marked subtensions are accurate only at the manufacturer’s specified magnification.
Success checkpoint: Small eye movements produce no meaningful reticle shift against the target.
Common mistake: Using the diopter ring to solve parallax. The diopter focuses the reticle; the parallax adjustment matches the optic’s image planes.
4. Manage breathing, trigger press, and follow-through
Breathe normally and use a short, comfortable pause after an ordinary exhale. A forced or prolonged breath hold increases movement and can reduce concentration. The shot should occur during a repeatable pause, not according to a rigid two- or three-second rule.
Place the trigger finger where the pull remains straight and does not push the rifle sideways. Trigger-finger placement varies with trigger geometry and hand size, so “the exact center” is less important than a consistent, straight rearward movement.
Follow-through means maintaining the position through the shot, keeping the head in place, and avoiding an immediate flinch or lift. Holding the trigger to the rear for one or two seconds can help diagnose movement, but forcing the trigger hold can create a new disturbance on some rifles.
Success checkpoint: The shooter can call the sight picture immediately before and after the shot.
Common mistake: Trying to make the rifle surprise the shooter. A smooth, predictable trigger is preferable to an artificial surprise break.
Which Mechanical Features Affect Rifle Accuracy?
Rifle accuracy depends on the interaction of action rigidity, barrel quality, chamber alignment, stock or chassis stability, trigger behavior, ammunition, and optic mounting. No single feature guarantees a small group.
Action type
| Action type | Typical strengths | Typical limitation | Best fit |
|---|---|---|---|
| Bolt-action | Rigid lockup, few moving parts, consistent chambering | One shot per cycle, slower follow-up | Bench, hunting, precision competition |
| Direct-impingement semi-automatic | Fast follow-up, stable firing position, broad parts support | Gas system and carrier movement add variables | Practical matches, training, defensive competition |
| Short-stroke piston semi-automatic | Cleaner operating system in some designs, fast cycling | Added mass and parts can affect balance | Field use and rapid-shot stages |
| Lever-action | Fast manual cycling, compact handling | Magazine and locking geometry limit precision potential | Hunting in thick terrain, recreational use |
A bolt-action is often the simplest path to maximum mechanical precision, but modern semi-automatic rifles can produce excellent groups. The practical winner depends on the required follow-up speed, shooting position, maintenance tolerance, and acceptable group size.
Barrel profile and twist rate
| Feature | Common specification | Accuracy effect | Trade-off |
|---|---|---|---|
| Sporter barrel | Approximately 0.55-0.70 inch muzzle diameter | Light and adequate for short strings | Heats and shifts sooner in many rifles |
| Medium contour | Approximately 0.70-0.85 inch muzzle diameter | Better heat resistance and stiffness | Adds weight during field carry |
| Heavy contour | Approximately 0.85 inch or greater muzzle diameter | Resists bending and slows temperature change | Poorer portability |
| Twist rate | Examples include 1:7, 1:8, 1:10, and 1:12 | Controls bullet spin rate | A poor match can reduce stability or raise fouling |
Twist rate is the distance required for one full bullet rotation. A 1:8 barrel makes one rotation in eight inches. Long, heavy bullets generally need faster twist, but bullet length and shape often predict stability better than weight alone. The ammunition manufacturer’s recommended twist range is the correct starting point.
A free-floated barrel has no intended contact with the stock along its length. Free-floating can reduce stock-pressure changes, but the “dollar bill test” is only a rough field check. Flexible stocks, sling tension, bipod loading, and action-bedding problems can still cause point-of-impact changes.
How Should MOA and MRAD Be Used?
MOA and MRAD are angular measurement systems used to describe group size and sight adjustments. One MOA equals 1.047 inches at 100 yards, while one MRAD equals 3.6 inches at 100 yards or 10 centimeters at 100 meters.
| Distance | 1 MOA | 1 MRAD | 0.5 MOA |
|---|---|---|---|
| 100 yards | 1.047 inches | 3.770 inches | 0.524 inches |
| 200 yards | 2.094 inches | 7.540 inches | 1.047 inches |
| 100 meters | 1.146 yards equivalent | 10 centimeters | 5 centimeters |
| 500 yards | 5.235 inches | 18.850 inches | 2.618 inches |
Many shooters use the simplified rule that 1 MOA equals 1 inch at 100 yards. That shortcut is adequate for informal discussion, while the exact 1.047-inch value matters when calculating a correction precisely.
Do not compare group sizes without checking the measurement method. Measuring outside edge to outside edge exaggerates the bullet diameter; subtracting one bullet diameter gives an approximate center-to-center group. A five-shot group is a useful practical standard, while ten-shot groups provide a stronger estimate of dispersion but consume more ammunition and increase barrel-temperature effects.
Is MOA or MRAD better?
Neither angular unit is inherently more accurate. MOA matches inch-based range discussions, while MRAD uses decimal adjustments and aligns naturally with meters and centimeter corrections.
| Consideration | MOA system | MRAD system |
|---|---|---|
| 100-yard correction | 1.047 inches per MOA | 3.6 inches per MRAD |
| 100-meter correction | 2.908 centimeters per MOA | 10 centimeters per MRAD |
| Common turret value | 0.25 MOA per click | 0.1 MRAD per click |
| Mental arithmetic | Familiar to many U.S. shooters | Efficient with decimal measurements |
Choose one system and learn its turret values, reticle subtensions, and ballistic-app settings. Mixing MOA turrets with MRAD holds creates avoidable errors.
Which Optic and Support Should You Choose?
The best accuracy equipment is the equipment that matches the shooting position, distance, target size, and transport requirement. A heavy bench rest can reveal rifle precision, but it does not predict performance from a standing field position.
| Equipment | Typical specification | Primary advantage | Main limitation |
|---|---|---|---|
| Bipod | 6-9 inches, adjustable legs | Fast prone support | Can bounce or load inconsistently |
| Front shooting bag | Filled, 5-10 pounds | Stable elevation support | Bulky for hiking |
| Rear squeeze bag | 1-3 pounds | Fine elevation adjustment | Requires a compatible stock shape |
| Barricade bag | Approximately 5-15 pounds | Conforms to irregular supports | Changes rifle interface pressure |
| Bench rest | Fixed front and rear support | Best for mechanical testing | Does not replicate field positions |
A first focal plane scope keeps reticle subtensions proportional at every magnification. A second focal plane scope keeps the reticle visually constant and can be easier to see at low power, but marked holds work at only one specified magnification.
For a hunting rifle, a lighter optic with a simple reticle may be more useful than a large precision scope. For repeated distance corrections, a reliable elevation turret, visible tracking, appropriate parallax adjustment, and a reticle matched to the chosen angular unit matter more than maximum magnification.
How Do You Test a Rifle’s Accuracy Properly?
A controlled accuracy test requires a safe range, a stable support, consistent ammunition, fouling control, and enough repeated groups to separate rifle behavior from random variation. A practical session usually takes 45-90 minutes and 20-40 rounds, excluding zeroing.
Before you start
- Confirm the rifle is unloaded during inspection and follow the range’s firearm rules.
- Check optic screws, action screws, stock contact, magazine fit, and muzzle devices.
- Use one ammunition lot for the initial comparison.
- Bring a stable front support, rear bag, ruler or calipers, notebook, thermometer, and spotting method.
- Choose a target with a precise aiming point and a safe backstop.
- Allow the barrel to cool consistently between groups.
Use this testing sequence
- Confirm the zero and rifle condition. Fire a small confirmation group after the rifle reaches its normal fouled condition. Record whether the barrel was cold, warm, clean, or fouled.
- Fire repeated groups. Use three to five five-shot groups at a known distance. Do not discard a shot merely because it looks inconvenient; record the reason only when a demonstrable external event occurred.
- Measure the groups consistently. Measure center-to-center, record the largest dimension and average group size, and convert the result to MOA or MRAD.
- Record group centers. A tight group that moves 1.5 inches between strings has a repeatability problem even if its average size looks attractive.
- Change one variable. Test a second ammunition load, support method, or optic setting separately. Changing ammunition, scope magnification, position, and cleaning status together destroys the diagnostic value.
- Repeat on another day. A single session cannot establish long-term performance because wind, mirage, temperature, and shooter fatigue affect results.
The strongest evidence is repeated performance across multiple sessions. A manufacturer’s sub-MOA guarantee may use a particular bullet, lot, distance, and group count, so it should not be treated as a universal result for every rifle.
What Do Common Accuracy Problems Mean?
| Observed pattern | Likely causes | Confirming test | Corrective action |
|---|---|---|---|
| Vertical string | Velocity variation, breathing, changing support pressure, heat | Chronograph if available, cool barrel, repeat support | Use consistent ammunition and position |
| Horizontal string | Trigger movement, wind, inconsistent shoulder contact | Shoot in calmer conditions, dry practice, observe recoil | Refine trigger press and wind reading |
| Diagonal spread | Combined wind and trigger errors, uneven support | Change position and test at shorter range | Rebuild NPA and support contact |
| Groups enlarge as shots continue | Barrel heat, mirage, fouling, shooter fatigue | Add cooling intervals and photograph mirage | Establish a realistic firing cadence |
| Group shifts after optic adjustment | Poor tracking, loose mount, incorrect turret return | Tall-target or box test at a safe range | Inspect mounting and verify turret tracking |
| One unexplained flyer | Ammunition defect, inconsistent release, shooter error | Repeat with documented shot calls | Do not diagnose from one shot alone |
Why does a group move when the barrel heats?
A heated barrel can change point of impact because steel expands, the vibration pattern changes, the stock or handguard contacts the barrel, mirage distorts the sight picture, or the shooter changes support pressure. Thermal movement is not proof that the barrel is defective.
A heavy barrel generally tolerates longer strings before noticeable movement, but it also takes longer to cool. Lightweight hunting barrels may produce excellent first or second shots and then shift as temperature rises. Test the rifle at the cadence required for its actual use.
Can a suppressor change accuracy?
A suppressor can change point of impact and group size because it adds weight at the muzzle, alters barrel vibration, and may introduce alignment or mounting variation. The shift is often repeatable when the suppressor is installed consistently, but the rifle must be zeroed in the configuration used for shooting.
A suppressor is not automatically an accuracy upgrade. Verify concentricity and have a qualified gunsmith inspect any suspected alignment issue. Follow local laws and the suppressor manufacturer’s firing and maintenance instructions.
Which Accuracy Standard Fits Your Use?
Accuracy requirements should follow the target, distance, position, and consequence of a miss. A benchrest group is a measurement of the rifle system, while a field-position hit depends heavily on the shooter and environmental judgment.
| User and task | Practical distance | Typical useful group standard | Sensible setup |
|---|---|---|---|
| Rimfire practice | 25-100 yards | 0.5-2.0 MOA, ammunition dependent | .22 LR, low-power optic, bags |
| General hunting | 100-300 yards | 1.0-1.5 MOA from supported position | Lightweight bolt-action, 3-9x optic |
| Varmint shooting | 100-400 yards | 0.5-1.0 MOA with suitable ammunition | Medium barrel, stable bipod, repeatable load |
| Precision competition | 300-1,000 yards | Rifle-specific, often under 1 MOA | Heavy rifle, FFP optic, verified dope |
| Semi-automatic practical match | 100-600 yards | Approximately 1-2 MOA depending on stage | Reliable gas system, moderate optic, fast support |
A hunting rifle is not improved by unnecessary benchrest weight if the shooter must carry it for hours. A precision competition rifle is not optimized by a thin barrel and low-power optic when repeated strings and small distant targets define the task.
What Should You Practice First?
Practice the process before purchasing upgrades. Dry practice with an unloaded rifle, in a safe direction and according to the manufacturer’s instructions, can reveal trigger movement and unstable sight alignment without ammunition cost.
Prioritize:
- Rebuilding the same position after each shot.
- Checking natural point of aim with relaxed muscles.
- Maintaining a consistent cheek weld.
- Pressing the trigger without disturbing the reticle.
- Calling the shot before looking at the impact.
- Recording conditions rather than relying on memory.
An expert rule of thumb is to change the least expensive, most observable variable first. If groups open after a scope change, inspect the mount before replacing the barrel. If groups improve when another shooter fires the rifle, investigate position and trigger technique before blaming ammunition.
Another useful rule is to diagnose patterns, not isolated shots. Three adjacent holes can be random chance; repeated vertical movement across several groups deserves a velocity, heat, and support investigation.
FAQ
Does a heavier rifle always shoot more accurately?
A heavier rifle does not automatically have better mechanical precision, but added mass reduces felt recoil and makes the position easier to hold. Heavy barrels also resist temperature changes during long strings. Weight becomes a disadvantage when the rifle must be carried, mounted quickly, or fired from unsupported field positions.
How many shots are needed to judge a rifle?
Use at least three five-shot groups for an initial comparison and five or more groups for a stronger practical estimate. Ten-shot groups reveal dispersion more reliably, but they increase ammunition use, barrel heat, and shooter fatigue. Compare ammunition only after the rifle condition and support method remain consistent.
Does cleaning a rifle improve accuracy?
Cleaning may restore accuracy when copper, carbon, or fouling has accumulated enough to change bullet engagement or pressure. Excessive cleaning can waste time and may create a different cold-bore condition for every test. Record whether the rifle is clean or fouled, then evaluate accuracy under the condition used in practice.
Is a cold-bore shot always different?
A cold-bore shot is not always a flyer. Some rifles place the first shot with the established group, while others shift because of fouling, temperature, bedding, or ammunition behavior. Hunters should test the first shot after storage and use that result when setting a realistic zero.
Can better ammunition fix poor rifle accuracy?
Better ammunition can reduce group size when the original load has inconsistent velocity, poor bullet-to-bore compatibility, or unsuitable bullet stability. Ammunition cannot fix a loose optic mount, damaged crown, poor support, or uncontrolled trigger movement. Test several factory loads before assuming the rifle needs modification.
What is the most important accuracy fundamental?
Consistency is the most important accuracy fundamental because every mechanical and human variable affects dispersion through repeatability. Begin with safe handling, a stable position, natural point of aim, a clear and parallax-controlled sight picture, and a straight trigger press before buying equipment upgrades.
The Bottom Line
Rifle accuracy fundamentals are the combined study of precision, zero, repeatability, external conditions, and practical shooting technique. Measure group size in MOA or MRAD, test with repeated groups, and separate rifle behavior from shooter error before changing equipment.
Start with the position and ammunition. Then verify the optic, barrel condition, support method, and environmental record. The most accurate rifle is not necessarily the heaviest or most expensive model; it is the complete system that produces a predictable result under the conditions in which the rifle will actually be used.


