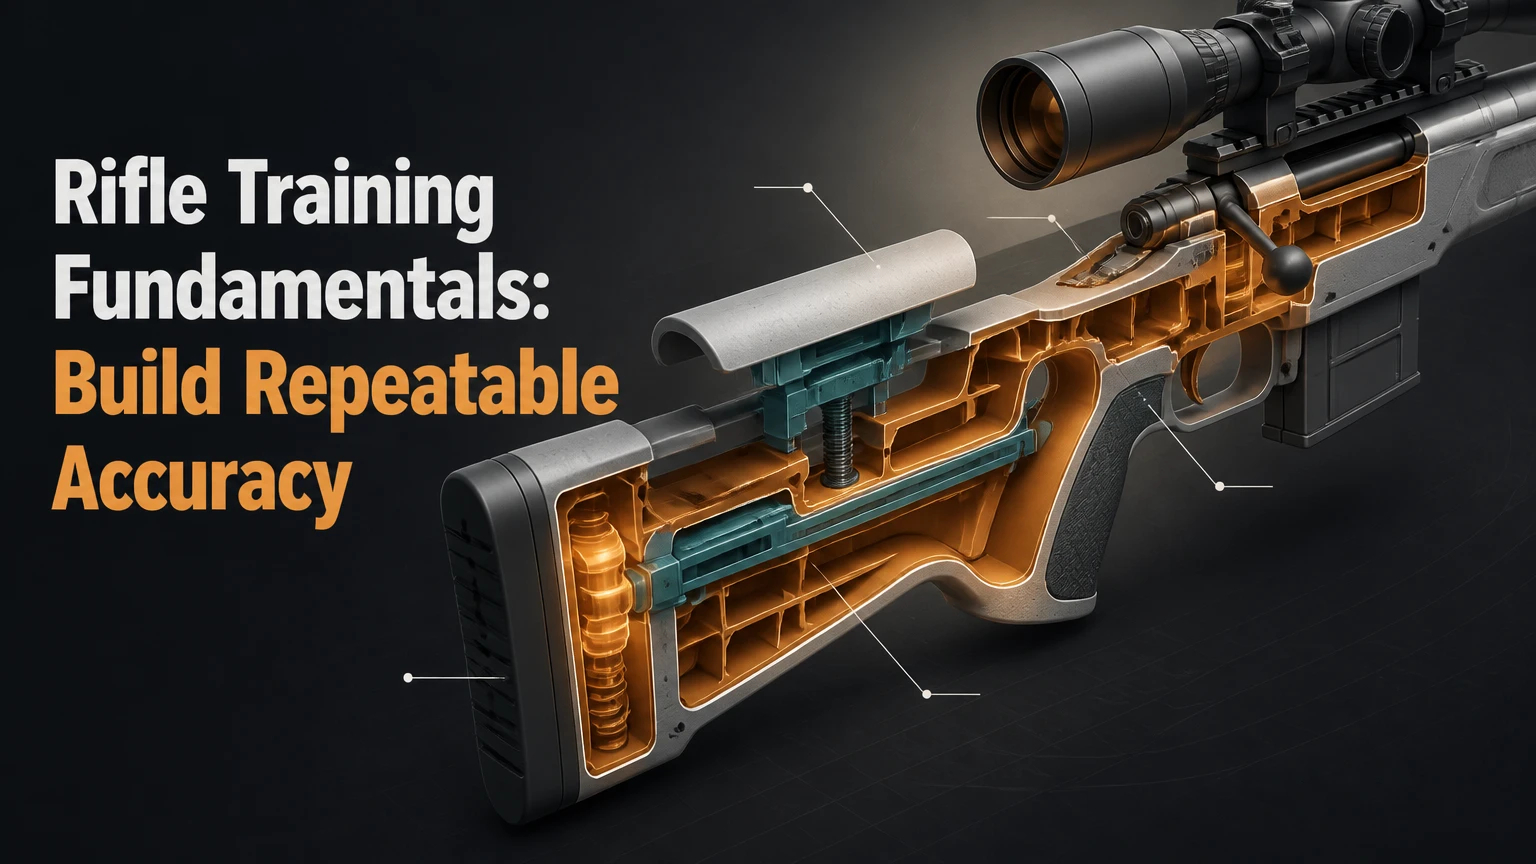
Rifle training fundamentals are the safety rules, body positions, aiming processes, trigger actions, and follow-through habits that let a shooter produce consistent results. The goal is not simply hitting a target once; it is reducing human error until rifle, ammunition, environment, and shooter performance can be evaluated separately.
Key facts at a glance
A stable rifle position uses skeletal support and controlled tension rather than excessive muscular effort.
Natural point of aim is the rifle’s relaxed direction after the shooter’s body settles behind it.
Sight alignment describes the relationship among the eye, sights, and reticle; sight picture adds the target.
A comfortable respiratory pause usually lasts only a few seconds, and forcing longer pauses can increase movement.
Trigger movement should be straight and independent from the firing hand, followed by uninterrupted follow-through.
A useful training session measures group size, shot calls, position consistency, and safety compliance, not ammunition count alone.
What Are Rifle Training Fundamentals?
Rifle training fundamentals are a connected set of repeatable actions that control the shooter’s position, visual information, breathing, trigger movement, and response after the shot. They apply to rimfire rifles, centerfire hunting rifles, precision rifles, and competition rifles, although the correct position and acceptable speed change by discipline.
Mechanical accuracy and practical accuracy are different. A rifle may produce 1 MOA groups from a machine rest, yet the shooter may produce 3 MOA groups from standing because balance, sight movement, trigger pressure, and fatigue add error. Fundamentals expose that difference.
The most useful model is a sequence rather than five isolated tips:
- Build a stable position.
- Establish natural point of aim.
- Confirm sight alignment and sight picture.
- Manage breathing without strain.
- Press the trigger and follow through.
The sequence is cyclical. After each shot, the shooter returns to the same position, confirms the same visual reference, and evaluates the shot before changing equipment or technique.
How Does Accurate Rifle Shooting Work?
Accurate rifle shooting works by minimizing movement during the short interval between final aim and bullet exit. Bone support, a repeatable cheek weld, a consistent shoulder contact point, and an independent trigger press reduce movement that muscles, breathing, recoil anticipation, and balance would otherwise introduce.
A rifle does not need to be motionless at every instant. The practical goal is a predictable, small movement pattern that lets the shooter decide whether the sight picture is acceptable. A shooter who forces the reticle onto the target may create more error than a shooter who waits for the natural movement to settle.
The rifle, optic, ammunition, and shooter form one system. Loose scope mounts can mimic poor trigger control, inconsistent ammunition can disguise a good position, and an unsuitable stock can create a cheek-weld problem that no breathing drill will solve.
The National Rifle Association’s widely published safety rule states, “Always keep the gun pointed in a safe direction.” That rule governs every training method, including dry fire, loading, unloading, malfunction handling, and movement between firing points.
How Should You Build a Rifle Position?
Build the rifle position from the ground upward, placing the stock in the shoulder pocket, supporting the rifle near its balance point, and allowing the head to settle naturally onto the stock. The best position is stable, repeatable, and appropriate for the task, rather than the position that appears most rigid.
Establish the main contact points
Use these checkpoints before aiming:
- Feet and legs: Place them so the body can remain balanced without constant correction.
- Pelvis and torso: Orient the torso toward the rifle’s direction instead of twisting around the stock.
- Shoulder pocket: Seat the butt firmly in the muscular pocket behind the collarbone, never on the collarbone itself.
- Support hand: Support the rifle’s weight under the handguard or fore-end with a relaxed grip.
- Firing hand: Maintain a repeatable grip while moving only the trigger finger.
- Cheek weld: Touch the stock at the same location and pressure for every shot.
- Eye position: Keep the eye within the optic’s specified eye-relief range.
Bone support carries the rifle more efficiently than arm tension. Excessive grip pressure can pull the rifle sideways, while an excessively loose grip can make recoil behavior inconsistent.
Position comparison
| Position | Typical stability | Setup time | Main advantage | Main limitation |
|---|---|---|---|---|
| Benchrest | Highest mechanical support | 5-15 seconds | Tests rifle and ammunition | Does not represent field shooting |
| Prone | Very high | 10-30 seconds | Uses ground and bone support | Limited visibility and mobility |
| Sitting | Medium-high | 5-15 seconds | Good field stability | Sensitive to leg length and terrain |
| Kneeling | Medium | 3-10 seconds | Raises the muzzle above vegetation | Less stable than sitting or prone |
| Standing | Lowest | 1-3 seconds | Fastest movement and visibility | Most affected by balance and fatigue |
Benchrest and prone should not be treated as interchangeable. Benchrest can identify a mechanical problem, while prone reveals how well the shooter can build a supported position. Neither position fully predicts standing performance.
How Do You Find Natural Point of Aim?
Natural point of aim is the direction the rifle points when the shooter’s body is balanced and relaxed behind it. To find it, settle into position, aim at the target, close the eyes briefly, breathe normally, and reopen the eyes without muscling the rifle toward the target.
If the sights moved away from the target, adjust the body rather than pushing the rifle with the arms. In prone, shift the entire body or pivot around the support structure; in standing, reposition the feet; in sitting or kneeling, change the lower-body angle.
Natural point of aim is not a permanent setting. It changes when the shooter moves the support hand, changes sling tension, shifts the pelvis, or becomes fatigued. A practical check is to confirm NPA whenever the group begins drifting horizontally without an obvious optic or ammunition explanation.
A common expert rule is simple: if the rifle must be held on target with continuous muscular effort, the position is not finished.
How Do Sight Alignment and Sight Picture Differ?
Sight alignment is the relationship between the shooter’s eye and the rifle’s sighting system, while sight picture is the aligned sight system placed on the intended target. Consistent alignment matters because a small eye-position change can shift the apparent aiming point, especially through a magnified optic.
With iron sights, the front sight is normally the sharp visual reference, while the rear sight and target appear less sharp. With a red-dot sight, the dot and target should remain visible together, and the shooter should avoid chasing the dot around the lens. With a riflescope, the reticle should appear fully visible without a dark crescent or “scope shadow.”
Optic and sight checks
| Sighting system | Primary visual focus | Typical eye-relief concern | Training checkpoint |
|---|---|---|---|
| Aperture iron sights | Front sight and target relationship | Eye centered behind aperture | Front sight remains consistently positioned |
| Open iron sights | Front sight | Rear notch alignment | Equal light or consistent reference around front sight |
| Red-dot sight | Target with dot superimposed | Usually unlimited eye relief | Dot appears quickly from a repeatable head position |
| Low-power variable optic | Reticle and target | Often about 3-4 inches, model-dependent | Full sight picture at every magnification |
| High-magnification scope | Reticle and target plane | Model-specific, often 3-4 inches | No shadow at the chosen shooting position |
Eye relief is a manufacturer specification, not a universal 3-inch rule. Mount an optic so the normal shooting position gives a full field of view without forcing the neck forward or backward.
How Should You Use Breathing?
Use normal breathing and take the shot during a brief, comfortable pause after exhalation if the sight picture is stable. Do not treat a fixed two- or three-second countdown as mandatory, because body position, stress, exertion, and cartridge recoil alter the shooter’s movement.
Breathing moves the torso and can move the rifle. A controlled pause can reduce that movement, but holding the breath too long increases discomfort, visual strain, and tremor. If the sight picture deteriorates, release trigger pressure, breathe normally, and rebuild the shot.
Breath control should support the position, not compensate for a poor position. Vertical stringing may come from breathing, but it can also come from inconsistent cheek pressure, changing shoulder contact, or a rifle that shifts on a rest.
How Do You Press the Trigger Correctly?
Press the trigger straight to the rear with the pad or appropriate portion of the index finger, applying smooth pressure without tightening the rest of the firing hand. The trigger break should not cause a visible flinch, and the shooter should maintain the sight picture through the shot.
Trigger technique depends partly on trigger design. A light precision trigger may require refined fingertip control, while a heavier hunting or duty trigger demands more deliberate isolation of the index finger. The safe pull weight is the one specified by the rifle manufacturer and appropriate to the rifle’s use, not a universal number.
Follow-through means maintaining the cheek weld, shoulder contact, body position, and visual focus after the shot. Hold the trigger to the rear momentarily, observe the rifle’s movement, and then reset the trigger according to the firearm’s design.
A useful skill is the shot call: before looking at the target, state where the sights were when the shot broke. A shot that was called left but landed left may confirm a position issue; a shot called centered but landing far away may point toward ammunition, optic, or mechanical problems.
Which Training Methods Work Best?
Dry fire develops procedures without ammunition, live fire confirms those procedures under recoil and noise, and structured instruction corrects errors that self-practice can reinforce. A balanced beginner program uses all three, with safety checks performed before every dry-fire session.
Dry-fire training
Dry fire can practice sight presentation, position building, trigger movement, breathing, and follow-through. Before beginning, remove all ammunition from the rifle and training area, inspect the chamber and action according to the manufacturer’s instructions, and use a safe backstop or approved training target.
A typical home session lasts 10-15 minutes, three times per week. Five careful repetitions are more useful than rapid manipulation that produces an inconsistent cheek weld or unsafe muzzle direction.
Live-fire training
Live fire measures recoil management, grouping, zero, and ammunition behavior. Start at a distance where the target is easy to see, use a supported position, and fire small groups with deliberate pauses rather than exhausting the shooter with a high round count.
Record rifle, ammunition, distance, position, weather, group size, and called shots. A notebook turns impressions into evidence.
Instructor-led training
A qualified instructor is especially valuable for a new shooter, unfamiliar rifle, physical limitation, or transition between disciplines. Ask about credentials, student-to-instructor ratio, safety procedures, range rules, and whether the course teaches marksmanship fundamentals before speed or movement.
Practical rifle courses may include barricades, positional changes, or target transitions. Those activities should follow a verified foundation and local legal requirements, with an instructor controlling the range.
Which Rifle Setup Metrics Matter?
The most useful setup metrics are mechanical accuracy, optic fit, zero distance, trigger characteristics, and ammunition compatibility. These measurements matter only when the rifle is safe, correctly assembled, and tested with the ammunition used for the intended task.
| Metric | Typical reference | What it means | Important limitation |
|---|---|---|---|
| 1 MOA at 100 yards | About 1.047 inches | Angular accuracy benchmark | Group size changes with distance and conditions |
| 1 MOA at 100 meters | About 2.91 centimeters | Metric equivalent | Not exactly 1 inch at 100 meters |
| Scope eye relief | Often 3-4 inches | Distance for a full sight picture | Exact value depends on optic model |
| Precision trigger pull | Often 1.5-3.5 pounds | Common precision-rifle range | Manufacturer and safety design control suitability |
| Hunting or duty trigger | Often 4.5-6.5 pounds | Common heavier-trigger range | Pull weight alone does not determine safety |
| 50/200 zero | Cartridge and rifle dependent | Near alignment at two distances | Not universal across ammunition or barrel heights |
MOA is angular, so a 1 MOA group is approximately 2.1 inches at 200 yards and 5.2 inches at 500 yards. The often-mentioned 50/200-yard zero can work well for some 5.56 NATO or .223 Remington setups, but bullet weight, velocity, sight height, atmospheric conditions, and actual zero confirmation determine the trajectory.
A zero is not proven by one shot. Fire a deliberate group, adjust according to the optic manufacturer’s click value, and confirm at the distance relevant to the task.
How Much Does Rifle Training Cost?
Typical rifle training costs range from $20-$150 for basic dry-fire equipment, $150-$300 for a one-day introductory class, and $500-$1,200 or more for a multi-day precision or practical course, excluding ammunition, travel, equipment rental, and range fees.
| Training level | Typical cost | Typical duration | Primary result |
|---|---|---|---|
| Home dry fire | $20-$150 one time | 10-15 minutes, 3 times weekly | Position and trigger consistency |
| Introductory class | $150-$300 | 4-8 hours | Safety, operation, and basic groups |
| Precision class | $500-$1,200+ | 2-3 days | Position, data collection, and distance work |
| Club practice | $10-$40 per visit | 1-3 hours | Repetition and feedback |
| Practical match | $20-$80 entry | Half to full day | Decision-making under match conditions |
A beginner can make measurable progress with one rifle, appropriate ammunition, eye and ear protection, a stable target, a notebook, and periodic instruction. Buying a more expensive optic before fixing position and trigger errors rarely produces the expected improvement.
What Causes Inconsistent Rifle Groups?
Inconsistent rifle groups usually result from changing contact points, trigger disturbance, recoil anticipation, poor natural point of aim, loose equipment, inconsistent ammunition, or shooter fatigue. Diagnose one variable at a time, because changing the optic, ammunition, position, and trigger technique together eliminates the evidence needed to identify the cause.
| Target pattern | Likely cause | First corrective action | Confirmation test |
|---|---|---|---|
| Vertical stringing | Breathing or cheek-weld variation | Rebuild position and use a comfortable pause | Compare two five-shot groups |
| Horizontal stringing | NPA or trigger movement | Relax, reposition the body, press straight back | Use shot calls before checking target |
| Sudden isolated flyers | Fatigue, ammunition, or loose equipment | Inspect mounts and rest, then reduce pace | Fire a fresh group with known ammunition |
| Low impacts before recoil | Anticipation or flinch | Use supervised ball-and-dummy training | Observe rifle movement on inert round |
| Groups shift after warming | Barrel or ammunition behavior | Record cold and warm group locations | Repeat under the same firing schedule |
| Entire group moves | Zero, mount, or environmental change | Check optic mounts and confirm zero | Return to a known-distance target |
The ball-and-dummy drill should be conducted only under competent supervision with ammunition controlled by the instructor or partner. The shooter should not know the loading sequence, and the rifle must remain pointed safely while the partner follows the range’s loading procedures.
A scattered group is not automatically a shooter problem. Scope-ring movement, loose action screws, damaged rests, inconsistent ammunition, and parallax error can create patterns that resemble poor fundamentals.
How Should Training Change by Discipline?
Training should match the positions, distances, time pressure, and equipment used in the chosen discipline. A beginner should first learn universal safety and marksmanship, then add hunting, precision, or practical tasks without discarding the same position, sight, breathing, and trigger principles.
| Shooter profile | Main priority | Recommended starting position | Useful equipment | Typical first goal |
|---|---|---|---|---|
| Absolute beginner | Safety and repeatability | Benchrest, then prone | .22 LR rifle, basic optic or sights | Five-shot groups with consistent calls |
| Hunter | Field stability and fast setup | Sitting, kneeling, supported standing | Sling, pack, shooting sticks | Build a stable position before fatigue rises |
| Precision shooter | Data and consistency | Prone with bipod or front support | Scope, rear bag, notebook | Repeatable groups and verified distance data |
| Practical competitor | Safe transitions and positional speed | Standing, kneeling, barricade positions | Two-point sling, red dot or LPVO | Maintain safe control while changing positions |
A .22 LR rifle is usually an efficient beginner platform because recoil and ammunition cost are lower than many centerfire alternatives. The limitation is that rimfire trajectory and wind behavior do not duplicate centerfire performance, so later training must include the intended rifle and ammunition.
Hunters should practice from realistic rests and uneven ground. Precision shooters should resist changing ballistic settings before confirming fundamentals. Practical competitors should add movement only when the rifle remains controlled and the range permits it.
What Is a Safe Four-Week Training Plan?
A safe four-week plan uses short dry-fire sessions, two or three supervised live-fire sessions, and one measurable objective at a time. The plan should stop when concentration or handling quality declines, because fatigue increases both marksmanship errors and safety risk.
| Week | Dry-fire focus | Live-fire focus | Measurement |
|---|---|---|---|
| 1 | Safety, position, cheek weld | Supported groups at known distance | Five-shot group size and shot calls |
| 2 | NPA and trigger press | Prone or seated groups | Group center and called-shot agreement |
| 3 | Breathing and follow-through | Alternate supported positions | Setup time and group consistency |
| 4 | Complete sequence | Confirmed zero and realistic positions | Repeatability across two sessions |
At every session, inspect the rifle, confirm ammunition compatibility, establish a safe direction and backstop, follow the range’s commands, and keep the action open when the rifle is not in use. Local law and range rules take priority over any generic training plan.
The correct progression is quality first, then distance, then position difficulty, and only afterward speed. A shooter who rushes early often practices the exact flinch, muscling, or unsafe handling that later becomes difficult to remove.
What Are the Main Limitations of Rifle Fundamentals?
Rifle fundamentals cannot overcome unsuitable ammunition, a damaged rifle, an incorrect zero, severe wind, poor visibility, or a position that the task does not allow. Fundamentals reduce shooter-induced error; they do not eliminate external variables or guarantee a hit.
Benchrest groups can overstate field capability. A 50/200-yard zero can simplify a starting setup but does not replace trajectory confirmation. A light trigger can improve precision for some users while increasing handling demands, and a high-magnification optic can make aiming easier at distance while slowing target acquisition at short range.
These limits matter because troubleshooting should begin with the simplest explanations. Confirm safe mechanical function, optic security, ammunition, distance, and zero before making complex changes to technique.
Frequently Asked Questions
Is a .22 LR rifle good for learning fundamentals?
A .22 LR rifle is often an excellent learning platform because it produces little recoil, has comparatively inexpensive ammunition, and allows longer practice without the same physical fatigue as many centerfire rifles. It cannot fully reproduce centerfire trajectory, wind drift, or recoil, so later practice should transfer the same fundamentals to the intended rifle.
How many rounds should a beginner fire in one session?
A typical beginner session may use 30-60 carefully observed rounds, although the correct number depends on concentration, recoil, range conditions, and instruction. Stop when groups widen, the shooter begins anticipating recoil, or safety procedures become inconsistent. Ten high-quality shots with useful notes can outperform 100 rushed rounds.
Should I start with a scope or iron sights?
Start with the sighting system required for the intended use, provided the rifle and optic fit correctly. Iron sights teach front-sight control and alignment, while a red dot or scope may be more practical for hunting or modern sporting rifles. A qualified instructor can identify eye-dominance and mounting problems before they become habits.
Why does my rifle shoot well from a bench but poorly standing?
Benchrest removes much of the balance, position, and recoil-management challenge that standing introduces. Standing requires skeletal alignment, lower-body balance, natural point of aim, and controlled trigger movement with less external support. Train from the bench to verify the rifle, then use supported and unsupported positions to measure shooter performance.
Is a 50-yard zero automatically a 200-yard zero?
A 50-yard zero is not automatically a 200-yard zero. Some .223 Remington and 5.56 NATO combinations produce a near 200-yard second intersection, but sight height, bullet weight, velocity, barrel, atmospheric conditions, and zero method change the result. Confirm the actual point of impact at both distances before relying on the relationship.
When should I hire a rifle instructor?
Hire an instructor at the beginning, when changing disciplines, when persistent errors remain unexplained, or when the rifle’s operation is unfamiliar. Choose someone who explains safety procedures, observes each shooter individually, uses controlled drills, and can distinguish equipment faults from technique problems.
The Bottom Line
Rifle training fundamentals combine safe handling, stable body position, natural point of aim, consistent sight alignment, controlled breathing, independent trigger movement, and follow-through. Practice them in that order, measure group size and shot calls, verify equipment before blaming technique, and progress from supported positions to realistic field conditions only when control remains consistent. A structured approach turns rifle accuracy from occasional success into repeatable performance.


