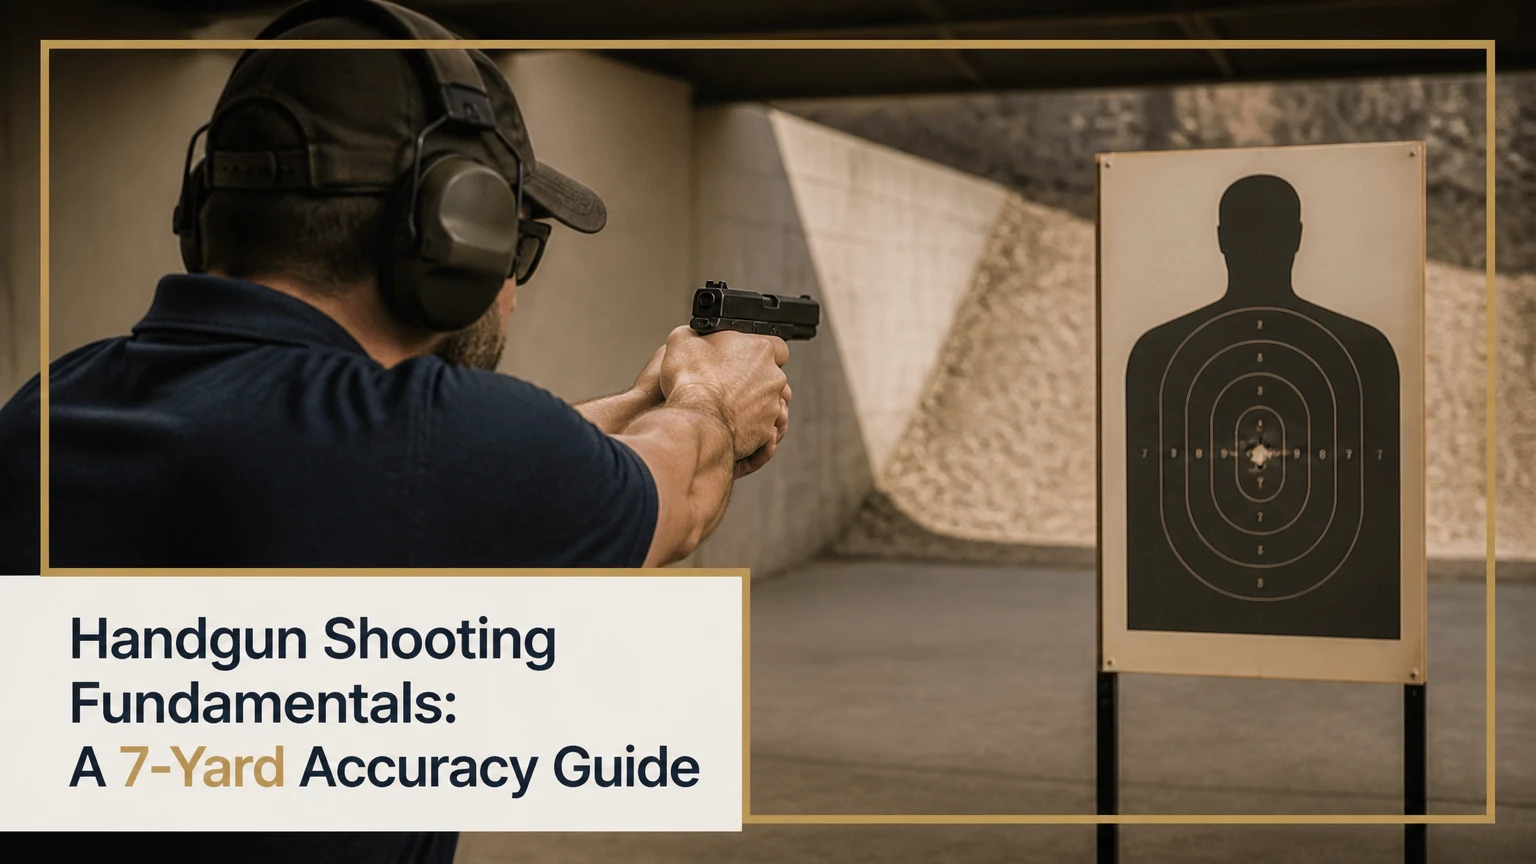
Handgun shooting fundamentals are the safety habits, body mechanics, visual skills, and trigger discipline that let a shooter fire accurately and consistently. The essential sequence is a stable stance, high two-handed grip, usable sight picture, natural breathing, uninterrupted trigger press, and follow-through, practiced under qualified range supervision.
Key Facts at a Glance
Handgun accuracy depends primarily on maintaining sight alignment while pressing the trigger without disturbing the pistol.
A high grip and strong support-hand contact reduce muzzle movement during recoil.
Iron sights require a clear front-sight focus; a red-dot sight normally supports target-focused vision.
Beginners should start at a distance where every shot can be evaluated, commonly 3-7 yards at an authorized range.
Dry practice requires an unloaded firearm, a safe direction, no ammunition in the practice area, and strict adherence to the manufacturer’s instructions.
Consistent weekly practice for 20-30 minutes is usually more productive than infrequent high-round-count sessions.
What Are Handgun Shooting Fundamentals?
Handgun shooting fundamentals are the repeatable actions that control safety, alignment, trigger movement, and recoil recovery. The fundamentals apply to recreational target shooting, formal marksmanship, and competition, but they do not replace legal knowledge, safe storage, medical preparation, or instruction from a certified professional.
A useful model is a chain rather than a checklist. The shooter identifies the target, establishes a stable platform, aligns the aiming system, presses the trigger without disturbing the gun, and observes the sights through recoil. A weak link can enlarge the group even when the other steps are sound.
The four universal safety rules should control every live-fire and dry-fire session:
- Treat every firearm as loaded.
- Keep the muzzle pointed in a safe direction.
- Keep the trigger finger outside the trigger guard until ready to fire.
- Know the target, what is beyond it, and what is between the shooter and the target.
The National Rifle Association publishes the first rule as, “Always keep the gun pointed in a safe direction.” Range commands, local law, and the firearm’s owner’s manual take priority over internet instructions.
How Does the Shot Cycle Work?
A handgun shot begins with visual information and ends with recoil recovery, so accuracy depends on the entire cycle rather than the trigger press alone. The eyes locate the intended target, the hands stabilize the pistol, the trigger releases the firing mechanism, and the shooter tracks the sights as the slide and barrel cycle.
The mechanical sequence is:
- The shooter establishes a safe direction and confirms the intended target.
- The visual system identifies the target and aiming reference.
- The arms and hands create a repeatable support structure.
- The index finger applies rearward pressure to the trigger.
- The firing mechanism ignites the primer, propelling the bullet through the barrel.
- Recoil moves the pistol, while the shooter maintains the grip and observes recovery.
- The shooter reassesses before taking another shot.
The pistol is not motionless during firing. The practical goal is to prevent unnecessary movement before the bullet exits the barrel and to return the sights predictably afterward.
What Are the Six Core Handgun Fundamentals?
The six core handgun fundamentals are stance, grip, sight alignment, sight picture, trigger control, and follow-through. Breath control supports the sequence, but a shooter should not create strain by holding the breath longer than a brief natural pause.
1. Establish a balanced stance
A balanced stance places the feet far enough apart to resist recoil while allowing comfortable movement and stable vision. Stand with the torso generally facing the target, knees relaxed, and body weight slightly forward without leaning at the waist.
The isosceles stance uses roughly equal arm extension and a squared torso. It is easy to teach, works well with two-handed grips, and allows the shooter to orient toward multiple targets. A modified isosceles stance can use a small amount of asymmetry for comfort or natural body alignment.
The Weaver stance uses a bladed lower body and opposing arm tension. Some traditional precision shooters find the tension familiar, but the position can be slower to reorient and may feel less natural for many beginners.
There is no universal “best” stance. The best stance is the one that produces a repeatable sight picture without pain, locked joints, or balance loss.
2. Build a high, two-handed grip
A high grip places the dominant hand as high as practical on the backstrap, while the support hand fills the exposed area on the grip. The support-hand fingers wrap around the dominant hand, and both thumbs point generally forward when the pistol design permits.
Keep the dominant index finger independent from the rest of the hand. Grip pressure should be firm enough to prevent shifting, but excessive tension can cause tremor and make trigger isolation harder.
The frequently repeated 60/40 or 70/30 pressure split is a useful starting experiment, not a universal measurement. Hand size, grip texture, pistol geometry, and recoil impulse change the result. Test pressure by watching whether the sights return consistently after each shot.
3. Align the sights and confirm the picture
Sight alignment is the relationship between the front and rear sights. With conventional equal-height sights, the front sight is centered in the rear notch and its top is level with the rear sight.
Sight picture is the placement of that aligned system on the intended impact area. Iron-sight users generally focus on the front sight while accepting a blurred target and rear sight. The human eye cannot keep all three planes equally sharp.
A red-dot sight changes the visual task. The shooter normally keeps attention on the target and allows the dot to appear in the viewing window. A dot that is not visible often indicates inconsistent presentation, not an optic failure.
4. Use natural breathing
Breathing moves the upper body, but breathing control should remain relaxed and brief. Allow a normal breath cycle and press during a short natural pause, rather than holding the breath until muscular tension or visual disturbance develops.
Precision shooting may use a more deliberate respiratory pause. General range practice should prioritize oxygenation, comfort, and repeatability. If the sight picture becomes unstable, breathe normally, lower the pistol safely, and restart.
5. Press the trigger without disturbing the sights
Trigger control means moving the trigger rearward while keeping the sights or dot acceptably stable. Use the portion of the index finger that allows a straight-to-the-rear press for that specific trigger and hand size.
Finger placement is not identical across every pistol. Too little finger can push the gun laterally for some shooters, while too much finger can pull it sideways. The correct placement is the one that permits a smooth press without visible sight displacement.
The “surprise break” is a training concept, not a requirement to ignore the trigger. The shooter should know the trigger is moving while avoiding a last-second snatch, brace, or flinch in anticipation of recoil.
6. Maintain follow-through
Follow-through means preserving the grip, visual focus, and trigger discipline through the shot and the initial recoil cycle. Keep watching the sights, allow the pistol to recover, and release the trigger only as required by the firearm and drill.
Trigger reset is the forward movement that prepares many semiautomatic pistols for another shot. Reset can be useful for understanding the mechanism, but manually staging the trigger reset is not more important than maintaining muzzle awareness and visual control.
Which Stance and Sighting System Fit the Shooter?
A squared two-handed stance is the most transferable starting position for many new shooters, while iron sights provide a simple baseline and red dots can improve target-focused vision after the presentation skill is learned. Equipment should support safe, repeatable practice rather than compensate for poor fundamentals.
| Choice | Typical strength | Typical limitation | Best initial use |
|---|---|---|---|
| Isosceles stance | Balanced recoil control and easy orientation | Wider body profile and possible shoulder fatigue | General range practice |
| Weaver stance | Familiar opposing-arm tension | Slower transitions for some shooters | Traditional precision practice |
| Iron sights | No battery and low replacement cost | Requires front-sight focus | Learning alignment fundamentals |
| Red-dot sight | Target-focused vision and clear aiming reference | Requires presentation practice and battery maintenance | Intermediate practice after basic control |
Red dots are not automatically easier. A new user may spend more time finding the dot than aligning iron sights, especially when the pistol presentation is inconsistent. A properly mounted optic also requires confirmation of zero, compatible ammunition testing, and a replacement battery schedule.
How Do Action Types Change Practice?
Striker-fired, double-action/single-action, and single-action handguns demand different trigger-management practice. Striker-fired pistols usually provide a similar trigger pull for each shot, while DA/SA pistols require the shooter to manage a longer, heavier first pull followed by shorter single-action pulls.
| Action type | Typical trigger sequence | Training implication | Common example |
|---|---|---|---|
| Striker-fired | Similar pull for each shot | Build one repeatable press | Glock 19, Smith & Wesson M&P9 |
| DA/SA | Heavy first pull, lighter later pulls | Practice the first-shot transition | Beretta 92, SIG Sauer P226 |
| Single-action | Short, light pull after cocking | Requires careful handling and control | Colt 1911 |
| Double-action-only | Long pull for every shot | Develop consistent long-press control | DAO compact pistols |
Trigger weight varies by model and should be measured or confirmed in the manufacturer’s specifications. Typical factory defensive pistols fall near 4.5-7 pounds, while competition pistols may use lighter triggers. A lighter trigger can reduce disturbance during the press, but it also reduces tolerance for careless handling.
How Should Beginners Structure Practice?
Beginners should start at 3-7 yards with an instructor or range safety officer available, then increase distance only when the group remains controlled. A 30-minute session can cover safety, slow fire, grip observation, and a small number of diagnostic exercises without encouraging rushed shooting.
Before you start
| Item | Typical requirement | Practical specification |
|---|---|---|
| Instruction | 1 supervised introductory lesson | 2-4 hours, local certified provider |
| Eye protection | 1 pair | Impact-rated range eyewear |
| Hearing protection | 1 set | Electronic or passive, correctly fitted |
| Target | 3-5 sheets | Large aiming area at 3-7 yards |
| Ammunition | 50-100 rounds | Caliber matched to the pistol |
| Practice time | 20-30 minutes | Short, focused session |
Confirm the range’s rules before arrival. Many facilities require chamber flags, prohibit certain ammunition, restrict drawing from a holster, or require a safety briefing.
A practical progression
- Begin with a safety and unloaded-gun check. Follow the range’s clearing procedure and keep ammunition separate during any dry practice. You will know the step is complete when the instructor or range procedure confirms the firearm’s condition. A common mistake is assuming a magazine removal alone makes every handgun safe.
- Fire slow, deliberate groups at 3-5 yards. Use five-shot groups and pause between shots to inspect stance, grip, sights, and trigger movement. You will know the pace is appropriate when every impact can be explained. A common mistake is increasing speed before the group is consistent.
- Evaluate the group, not one isolated hole. Measure the group’s approximate extreme spread and note whether impacts are centered. You will know the process is useful when the same error appears across several groups. A common mistake is changing grip, sights, ammunition, and stance simultaneously.
- Add a controlled cadence at 5-7 yards. Fire two or three shots only after the sights return and the target remains clearly identified. You will know recoil management is improving when the second impact stays within the intended scoring area. A common mistake is chasing speed with an incomplete sight picture.
- Finish with a repeatability test. Use the same stance, grip, distance, and ammunition on a later day. You will know the skill is becoming reliable when group location and size remain similar across sessions. A common mistake is judging progress from a single unusually good group.
How Should Progress Be Measured?
Progress is best measured by smaller, more consistent groups at a controlled pace, not by raw speed or ammunition volume. A practical beginner benchmark is keeping five-shot groups inside a 4-inch circle at 7 yards, but the benchmark depends on the pistol, sights, ammunition, and shooter.
| Training stage | Distance | Exercise | Useful checkpoint |
|---|---|---|---|
| Orientation | 3 yards | Five slow shots | Safe handling and stable aiming |
| Foundation | 5 yards | Three five-shot groups | Repeatable group location |
| Consolidation | 7 yards | Five-shot groups | About 4 inches or less, typical goal |
| Precision | 10-15 yards | Slow groups | Consistent sight and trigger process |
| Testing | 25 yards | Supported or deliberate groups | Identify mechanical and human limits |
A group that is tight but consistently off-center may indicate sight zero or ammunition characteristics rather than poor trigger control. A large, irregular group usually indicates inconsistent inputs, although mechanical problems and poor ammunition can also contribute.
What Are the Most Common Accuracy Problems?
Most handgun accuracy problems originate in anticipation, inconsistent grip, visual confusion, or trigger disturbance. A target diagnostic chart can suggest a cause, but only repeated groups and instructor observation can establish the cause reliably.
| Observed result for a right-handed shooter | Possible cause | First correction |
|---|---|---|
| Low impacts | Recoil anticipation or breaking the wrist | Slow down and use inert practice under supervision |
| Low-left impacts | Trigger snatch or downward push | Watch sights through a slower press |
| Right impacts | Excess finger contact or thumb pressure | Adjust finger position and relax the thumb |
| Wide horizontal group | Inconsistent grip or trigger direction | Keep the support hand engaged and repeat |
| Wide vertical group | Sight focus, breathing, or elevation change | Use a natural pause and consistent visual focus |
Left-handed shooters may see the opposite lateral pattern, but charts are not universal. Handgun design, eye dominance, grip shape, and ammunition can change the result.
How can a shooter reduce flinching?
Flinching decreases when the shooter experiences predictable, low-pressure practice and receives immediate feedback without trying to overpower recoil. A qualified instructor can use inert training rounds in accordance with range rules, or the shooter can use approved dry practice with the firearm verified unloaded and ammunition removed from the area.
Do not ask an untrained partner to manipulate a loaded firearm for a surprise exercise. The safest diagnostic method is controlled instruction, clear range procedures, and a target that reveals whether the sights move before the click or shot.
Why does grip pressure change the group?
Grip pressure changes the group because unequal or late hand tension moves the pistol as the trigger finger presses. “Milking” the grip, where several fingers tighten together, commonly pulls the sights away from the intended impact point.
The correction is not maximum force. Build the grip before presenting the pistol, keep support-hand contact consistent, and observe the sights during an unloaded practice press. If the sights move at the click, reduce speed and isolate the trigger finger.
Is Dry Fire Useful and Safe?
Dry fire can improve sight stability and trigger movement without ammunition, but it is safe only when the firearm is verified unloaded, ammunition is physically outside the practice area, and the manufacturer permits the practice. Dry fire cannot reproduce recoil, noise, stoppages, or the pressure of live range conditions.
A conservative 10-minute routine can include:
- A safety check using the firearm’s prescribed unloading procedure.
- Five slow presentations to an approved safe target area.
- Ten trigger presses while watching the front sight or optic.
- A final condition check before ammunition returns to the room.
Use snap caps only when the firearm manufacturer or qualified instructor recommends them. Never use dry fire as a reason to point a firearm toward a person, occupied room, or uncertain backstop.
How Much Do Training and Practice Cost?
Typical beginner costs include $100-$250 for an introductory course, $15-$30 for a range visit, and approximately $20-$35 for a 50-round box of common 9mm practice ammunition. Local prices, taxes, ammunition availability, membership status, and instructor credentials can change the total substantially.
| Expense | Typical range | Frequency | Cost-control option |
|---|---|---|---|
| Introductory course | $100-$250 | One-time | Compare class length and credentials |
| Range fee | $15-$30 | Per visit | Membership after regular attendance |
| 9mm practice ammunition | $20-$35 per 50 | Per session | Buy legally available bulk quantities |
| Eye and ear protection | $30-$100 | One-time | Replace damaged PPE promptly |
| Paper targets | $1-$5 each | Per session | Use range-approved printable targets |
A 50-round session may be enough for a beginner when each shot receives attention. High-volume shooting can create fatigue, reinforce poor movement, and increase cost without producing better learning.
Which Handgun Setup Is Most Manageable?
A reliable, mid-size handgun with manageable recoil and controls that fit the shooter is usually easier to learn than an ultra-small pistol. The best beginner setup is not determined by brand alone; it depends on hand fit, trigger reach, sight visibility, reliability, and the availability of qualified instruction.
A full-size or compact 9mm often offers a useful balance of grip surface, ammunition availability, and recoil. Small pocket pistols can be convenient to carry, but their short grips and lower weight often make them harder to control during extended practice.
| Shooter situation | Useful setup | Typical advantage | Limitation |
|---|---|---|---|
| New range shooter | Compact 9mm, two magazines | Manageable size and common ammunition | May require grip-size adjustment |
| Small hands | Interchangeable backstraps or narrow grip | Better trigger reach | Fewer models fit comfortably |
| Recoil-sensitive shooter | Full-size 9mm or .22 LR trainer | Lower perceived movement | Different controls or recoil cycle |
| Optic learner | Optic-ready compact pistol | Supports target-focused aiming | Requires mounting, zeroing, and batteries |
| Precision hobbyist | Full-size target pistol | Longer sight radius and stable weight | Less convenient for transport or carry |
A rental counter can help compare fit before purchase, provided the facility offers safe instruction and the shooter follows its handling rules. Comfort matters because an uncomfortable grip changes trigger reach and repeatability.
How Often Should Someone Practice?
A new shooter benefits from one supervised live-fire session every one to four weeks, supplemented by short dry practice only when the safety conditions are met. Skill retention depends on quality, repetition, and consistency more than on a single monthly round count.
Use a simple maintenance cycle:
- Weekly: 10 minutes of approved dry practice or visual rehearsal.
- Every two to four weeks: 50-100 carefully evaluated live rounds.
- Every three months: Recheck grip, sights, ammunition, and safe-handling procedures.
- Annually: Take a refresher lesson and inspect protective equipment.
Motor skills are perishable, but a rigid calendar is not universal. Work schedules, health, access to a range, and local law may require a different plan.
What Changes for Left-Handed, Cross-Dominant, or Older Shooters?
Left-handed and cross-dominant shooters can use the same fundamentals with adjustments to eye focus, grip controls, and presentation. Cross-dominance means the dominant eye and dominant hand differ, so an instructor should help determine whether a small head adjustment or alternate aiming eye produces the clearest, safest sight picture.
Shooters with reduced hand strength may benefit from a larger grip surface, lighter recoil, and loading aids approved for the firearm. Older eyes may need different sight contrast or an optic, but an optic introduces battery, mounting, and presentation requirements.
Pain is a stop signal. Persistent wrist, shoulder, or hand pain warrants medical advice and a qualified instructor’s equipment adjustment, not increased grip force.
What Should a Shooter Avoid?
Avoid practicing speed, drawing, movement, or unusual positions until basic safety and accuracy are consistent under direct instruction. Avoid modifying trigger systems, adding accessories, or changing ammunition while attempting to diagnose a fundamental error.
The most important practitioner rule is to change one variable at a time. Keep the same distance, target, ammunition, and cadence while testing a grip adjustment; otherwise, the shooter cannot know which change produced the result.
A second rule is to stop before fatigue changes the grip. Five accurate groups teach more than fifty rushed shots. A third rule is to treat every miss as information, not as a reason to shoot faster.
Frequently Asked Questions
Is handgun shooting mostly about strength?
Handgun shooting relies more on consistent alignment and trigger movement than on maximum strength. A firm two-handed grip and balanced stance help manage recoil, but excessive muscular tension can cause shaking and interfere with the trigger. Properly fitted equipment reduces the strength required for repeatable control.
Should beginners use a red dot or iron sights?
Beginners can start with either system, but iron sights make alignment errors easy to see while red dots support target-focused vision after presentation is consistent. A shooter who cannot reliably present the pistol to the same visual window may initially learn faster with simple iron sights and add an optic later.
What distance is best for learning handgun accuracy?
Three to seven yards is a practical starting distance because the shooter can see the group and receive immediate feedback. Move to 10-15 yards after the group remains consistent. Twenty-five yards is useful for testing precision, but it can hide small trigger errors when a new shooter is still building control.
How many rounds should a beginner shoot?
A beginner can often learn effectively with 50-100 rounds in a focused session, depending on fatigue, instruction, and range time. More ammunition does not guarantee more skill. Stop when concentration, grip consistency, or safe handling deteriorates, then record the result for the next session.
Can a handgun be accurate if the shooter is using the wrong ammunition?
A handgun can function with the correct ammunition while producing different group locations or group sizes with different bullet weights and loads. Use only ammunition specified for the firearm, and confirm any sight adjustment with the exact load intended for regular practice or competition.
When should someone take a professional lesson?
A professional lesson is appropriate before independent live fire, after a long break, when safety procedures are unclear, or when repeated groups do not improve. Choose an instructor who explains the firearm’s operation, follows range safety rules, evaluates the shooter directly, and adapts instruction to hand size, vision, and physical limitations.
The Bottom Line
Handgun shooting fundamentals are a connected system: safety, stance, grip, sight management, breathing, trigger control, and follow-through. Start at 3-7 yards with a qualified instructor, use a manageable handgun, practice in short sessions, and change only one variable when diagnosing errors. Consistency matters more than speed, equipment, or ammunition volume. Revisit these handgun shooting fundamentals regularly because reliable skill requires maintenance.


